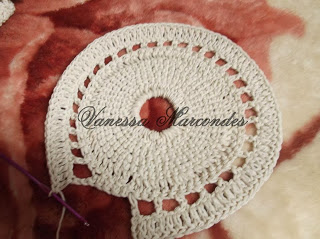
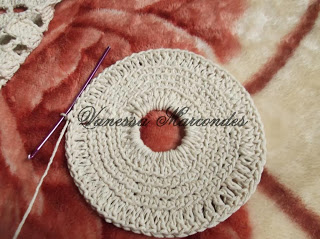
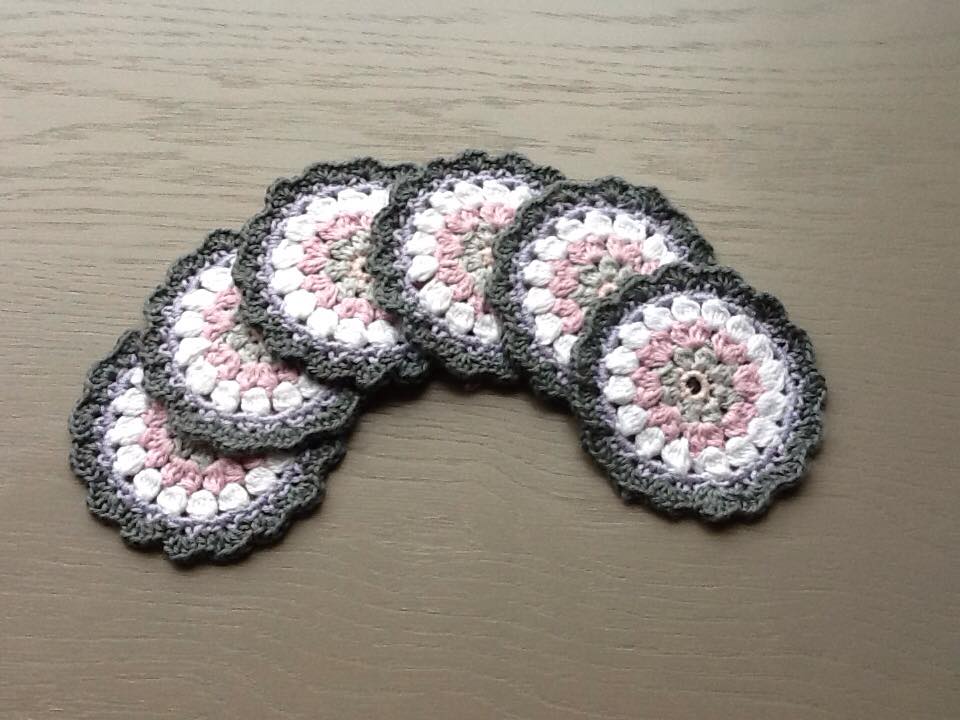
Crochet bloemen onderzetters haken

image

– 5 kleuren katoen naar keuze (Catania / Phildar Cotton 3)  
– haaknaald 3,5.

Patroon
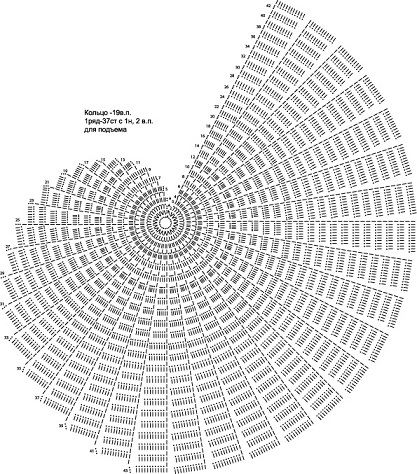
1. Start met het haken van 4 lossen. Sluit deze met een halve vaste.

2. Haak dan 1 losse en hierna nog 7 vasten in de ring. (totaal dus 8 steken). Hecht af.

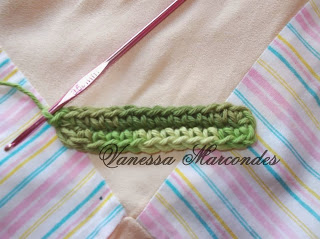
3. Met een nieuwe kleur ga je nu ‘clusters’ van 3 stokjes maken, in iedere vaste 1 cluster. Begin met 2 lossen, hierna maak je een stokje half af (het laatste onderdeel van het stokje, n.l. draad overhalen en door de 2 lussen halen, achterwege laten.) Je haakte met de lussen nog op de haak het derde stokje en ook deze maak je half af, zie foto. 

4. Dan de draad omslaan en in 1 keer door alle lussen haken. Dit noem ik een ‘cluster’.

5 en 6. Doe ditzelfde in de volgende vaste uit de vorige toer: 3 stokjes half afmaken en dan in 1 keer draad omslaan en door alle lussen halen. Zo ga je door tot je 8 x 3 clusters hebt. Haak steeds een losse tussen anders gaat je werk bol staan.

7. Hecht af met een halve vaste.
8en 9. Je gaat nu hetzelfde doen als de vorige toer, alleen in alle tussenruimtes uit de vorige lichtblauwe toer steeds 2 clusters van drie stokjes. Steeds 1 losse er tussen iedere cluster.

10. Sluit af met een halve vaste.

11 en 12. Nieuwe kleur aanhechten en weer starten met 2 lossen (eerste halve afgemaakte stokje), dan 4 half afgemaakte stokjes in dezelfde ruimte en samen haken. Let op: dan 2 steeds lossen haken tussen de clusters. anders gaat hij bol staan..! 

13 en 14. In de volgende ruimtes weer een cluster van 5 half afgemaakte stokjes. Herhaal tot einde.

15. Hecht af.
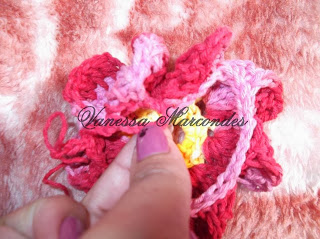
16. Hecht een nieuwe kleur aan. Nu ga je steeds afwisselen: 3 vasten in de tussenruimtes van de vorige toer, 1 vaste bovenop de cluster van de vorige toer zie  (foto 16), dan weer 3 vasten in de tussenruimte, 

1 vaste bovenop. Herhaal tot het einde en hecht af met een halve vaste.

17. De draad uit de vorige toer haak ik altijd een paar steken mee. Hier zie je de achterkant van het haakwerk; ik knip hem steeds weer af. Het kan ook met een maasnaald, maar dit gaat sneller 😉

18. Hecht een nieuwe kleur aan in het midden van de 3 vasten uit de vorige toer voor de schulprand. Je begint zo: 2 lossen en dan 4 halve stokjes in dezelfde ruimte. 1 vaste overslaan.

19. Sluit bovenop de ene vaste uit vorige toer met een halve vaste. 1 vaste overslaan

20 en 21. Dan weer in het midden van de 3 vasten uit de vorige toer: 5 halve stokjes, vaste overslaan. enz.

22. Hecht af. Ik doe dit altijd zo (want je wilt niks zien bij de onderzetter) Maak een knoopje na het sluiten van de laatste steek met een halve vaste.

23. Steek de haaknaald in de eerste steek van deze toer en trek het draad en knoopje er door.

24. De voorkant ziet er nu zo uit. Ja, zoek de afhechting.. 🙂

25. De achterkant werk ik af met een dunnere haaknaald: trek de draad door een paar steken van de schulprand en knip af.

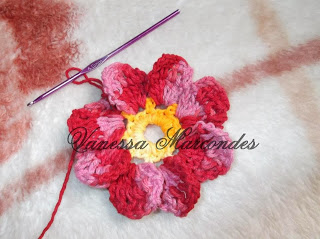
Is klaar.

oma crochet
Crochet for children

image

Free pattern by S. A
size H/8 (5.00 mm)

Body (starting at the tail)
Round 1: ch 2, sc 6 into second ch from hook (6)
Round 2: *sc 1, sc 2 in next st* repeat (9)
Round 3-5: sc around (9)
FO
You now have one tail fin.

Repeat rounds 1-5 but do not FO
In round six you are connecting the two tail fins by putting them together. When pushing the hook through a stitch to sc, push the hook through both stitches of the two tail fins and sc them together.
Round 6: sc 3 in the manner described above, sc 12 normally clockwise (12)
Place your stitch marker in this last stitch.
Round 7: sc around (12)
Round 8: *sc 3, sc 2 in next st* repeat (15)
Round 9: *sc 2, sc 2 in next st* repeat (20)
Round 10: *sc 3, sc 2 in next st* repeat (25)
Round 11-14: sc around (25)
Round 15: *sc 4, sc 2 in next st* repeat (30)
Round 16-18: sc around (30)
Round 19: *sc 4, dec* repeat (25)
Round 20: *sc 3, dec* repeat (20)
Round 21: *sc 2, dec* repeat (15)
Round 22: *sc 3, dec* repeat (12)
Stuff
Round 23: *sc 1, dec* repeat (8)
dec until shut. FO and use yarn tail to sew the hole shut.

Nose
Round 1: ch 2, sc 8 into second ch from hook (8)
Round 2: *sc 1, sc 2 in next st* repeat (12)
Round 3: sc around (12)
Round 4: *sc 5, sc 2 in next st* repeat (14)
slst FO

Flippers (make 2)
Round 1: ch 2, sc 6 into second ch from hook (6)
Round 2: *sc 2, sc 2 in next st* repeat (8)
Round 3: sc around (8)
Round 4: *sc 3, sc 2 in next st* repeat (10)
slst FO

Assembly
Stuff the nose and attach it to the seal’s head, covering the hole where you finished off. Stuff both the flippers and attach them on either side of the seal’s body. You can use buttons or felt for the eyes and nose or you can embroider them. You may also like to add wiskers?

© Suzanne Alise
This pattern is for personal use only. You may not sell the pattern or the amigurumi made from the pattern.

oma crochet

♡♡♡♡♡♡♡♡♡♡☆☆☆☆
image

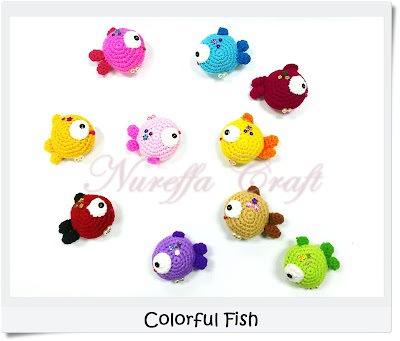
COLORFISH (AMIGURUMI FREE PATTERN)

Materials:
· Yarn(s) –
· Crochet Hooks – Size 3.0mm
· Yarn Needle or Normal Needle
· Fiberfill
· Beads or small round sequins (Black colour )
· Small amount of sequins or beads (assorted colors )
· Fabric Glue.

Abbreviation:
· MR – Magic Ring
· sc – Single Crochet
· 2 sc in next sc – Increase
· dec 1 – Decrease
· Ch – Chain
· Sl St – Slip Stitch
· * * – Repeat Step
· F/O – Fasten Off

Body (make 2 )
Use any colour you want and 3.0mm Hook.
Rnd 1: MR, sc 6 in MR. (6)
Rnd 2: 2 sc in each sc around. (12)
Rnd 3: *sc 1, 2 sc in next sc*, repeat around. (18)
Rnd 4: *sc 2, 2 sc in next sc*, repeat around. (24)
Rnd 5: *sc 3, 2 sc in next sc*, repeat around. (30)
Rnd 6: *2 sc in next sc, sc 4*, repeat around. (36)
F/O and leave long end for sewing to Outer body (1 side of the body only)

Note: you can continue crocheting until you satisfied with the size of the body that you want it to be

Tail ( make 2 )
Use darker colour and 3.0mm Hook.
Rnd 1: MR, sc 6 in MR. (6)
Rnd 2: 2 sc in each sc around. (12)
Rnd 3: sc around
Rnd 4: sc around
F/O and leave 15cm long end for sewing

Note: you can adjust the size of the tail to fit with the body. J

Fin
Use darker colour and 3.0mm Hook.
Rnd 1: ch5, sc in 2nd ch from hook, hdc in next ch, dc in next 2ch.
F/O and leave 15cm end for sewing to the body.

White Eyes ( make 2 )
Use white yarn and 3.0mm Hook.
Rnd 1: MR, sc 6 in MR. (6)
Rnd 2: 2 sc in each sc around. (12)
F/O

Assembling:
Use matching thread colors, sew the body
· Sew both body together. Stuff body with fiberfill and close up the hole.
· Sew both tail and fin to the body.
· For the white eyes, you can glue it or sew it to the body. Use black color beads or sequins for the black eyes. Sew or glue on to the white eyes.
· Lastly, the most exciting part is to decorate your colorfish body, You can choose to add small amount of sequin and beads, sew or glue on the body.

Note: You can decide on what decoration and expressions you want to make for your colorfish. These are just guidelines of how i’ve made mine. You can choose to use embroidery eyes, wiggly eyes etc. Get creative and make your unique Reversible expressions for your amigurumi.

And Congratulations, you’ve completed your Colorfish!

This pattern is an original pattern by Nureffa Craft (September 2012). Please do not claim this pattern as your own. If you wish to share this pattern, you may link to this pattern but please do not reprint it on your site. You may keep a copy for your own personal use but you may not sell or distribute it. Kindly inform and credit Nureffa Craft if you want to sell items made from this pattern. Thank You.

♡♡♡♡♡♡☆☆☆☆☆☆☆☆
image

image

Patroon vertaald door Jannie ter Haar .

image

image

image

ratis haakpatroon
Ronde Tafel Mat

USA Formaat

Afkortingen
WS. Wrong Side
RS. Right Side
sc. Single Crochet
dc. Dubbele Haak
rpt. Herhaal
hv. Slip Stitch

Shell Groep. (3DC, ch1, 3DC)

Basis van ch. Werk in eerste steek

ch3 telt als eerste v

Afgewerkt formaat ca.: 9.5 “x 9.5 Duim 

Materialen 
0.5oz van Worsted Gewicht # 3 Garen in Kleur 1
1.10oz van Worsted Gewicht # 3 Garen in Kleur 2
4.50mm Haaknaald

METER – 5DC & 2 rijen van dc hoogte van ca 2 “vierkant

**************************************************

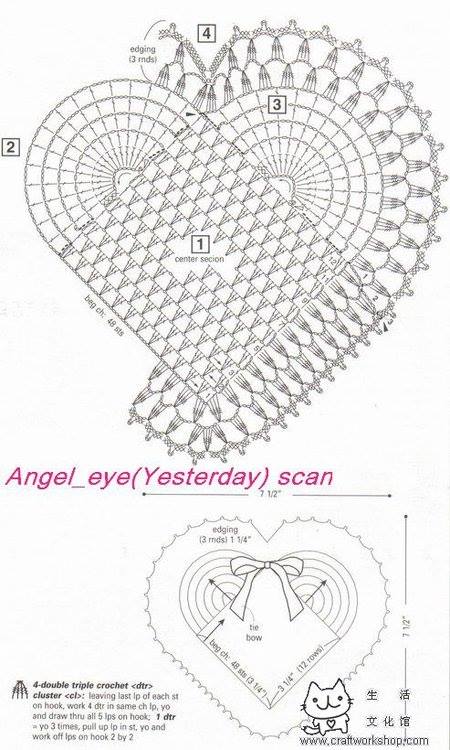
Round Table Mat – (Made in rondes met draaien) Met 4.50mm haak en kleur 1, CH4,
hv tot de eerste l om een ring, ch3, (RS) werken 12DC in de ring, hv tot de top van ch3 maken. (12DC + CH3)

Row 2 – Werk ch3, 2dc in iedere v tot het einde, hv tot de top van ch3. (24DC + CH3)

Rij 3 – Werk ch3, 2dc in iedere v tot het einde, hv tot de top van ch3. Hecht af. (48DC + CH3)

Rij 4 – Doe mee met kleur 2, ch3, 2dc in de volgende v, * sla 2dc, 3DC in de volgende v, * RPT van * tot * tot
2dc duren, door een aantal laatste 2dc, hv tot de top van ch3 bij het begin van de toer. (16, 3DC groepen)

Rij 5 – hv op de eerste v, ch3, 2dc in dezelfde ruimte, * sla 1 v, 1SC in de ruimte tussen de
twee volgende 3DC groepen, sla 1 v, 3DC in het centrum v op de volgende 3DC groep, * RPT van * tot * tot
het einde, sla 1 v, 1SC in de ruimte tussen de laatste twee 3DC groepen, hv tot de top van ch3 bij het begin
van de toer. (16, 3DC groepen)

Rij 6 – hv op de eerste v, ch3, 4DC op basis van ch3, * sla (1 v, 1SC, 1 v), werk 5DC in
de volgende v, * RPT van * tot * tot het einde, hv tot de top van ch3 op begin van de rij. (16 5DC groepen)

Rij 7 – hv komende 2dc, ch3, 4DC in dezelfde ruimte, * sla 2dc, 1SC in de ruimte tussen de
twee volgende 5DC groepen, sla 2dc, 5DC in het centrum v op de volgende 5DC groep, * RPT van * tot * tot het einde, skip 2dc, 1SC in de ruimte tussen de laatste twee 5DC groepen, hv tot de top van ch3 op het begin van
de nld. (16 5DC groepen)

Rij 8 – hv in de volgende 2dc, ch3, (3DC, ch1, 4DC) in dezelfde v, * sla (2dc, 1SC, 2dc), werk
(4DC, ch1, 4DC) in de volgende v, * RPT van * tot * tot eind, hv naar boven van ch3 bij het begin van de toer.
(16 shell groepen)

Rij 9 – hv naar volgende ch1 ruimte, ch3, (3DC, ch1, 4DC) in dezelfde ruimte, * sla 4DC, 1SC in
de ruimte tussen de twee volgende shell groepen, sla 4DC, (4DC, ch1 4DC) in ch1 ruimte op volgende Shell groep, * RPT van * tot * tot het einde, sla 4DC, 1SC in de ruimte tussen de laatste twee shell groepen, hv
tot de top van ch3 bij het begin van de toer. (16 shell groepen) Hecht af.

Rij 10 – Re-join kleur 1, ch1, 1SC op basis van ch1, 1SC in elk van de volgende 3DC, * (1SC, CH2, 1SC) in de volgende ch1 ruimte, 1SC in elk van de volgende 4DC, hv in de v, 1SC in elk van de volgende 4DC, * RPT van
* tot * tot 4DC en sc, 1SC in elk van de laatste 4DC, hv duren in de v, hv tot de eerste v van het begin van de toer. Hecht af.

Afwerking – Naai in en afhechten losse eindjes.

Deel dit:
TjilpenFacebook 42Google

Dit bericht is geplaatst in Uncategorized . Bookmark de permalink .
Bericht navigatie← Stitch Chevron …. Haak of haken Make me beterIk weet niet waarom ik ben niet blij met mijn haak. : ‘( →
LAAT EEN ANTWOORD ACHTER
Respect voor Jannie ter Haar . Heel bedankt

Model Jennifer Martin : free pattern

image

http://www.ravelry.com/patterns/library/flower-potholders
Model Jennifer Martin: free pattern download here in English

image

image

Free crochet pattern
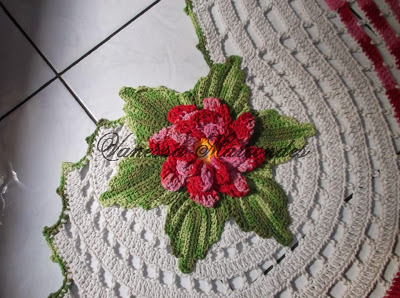
Round Table Mat

USA Format

Abbreviations
WS. Wrong Side
RS.  Right Side
sc.   Single Crochet
dc.   Double Crochet
rpt.   Repeat
sl st. Slip Stitch

Shell Group.  (3dc, ch1, 3dc)

Base of ch. Work in first stitch

ch3 counts as first dc

Finished size approx: 9.5” x 9.5 Inches  

Materials 
0.5oz of Worsted Weight #3 Yarn in Color 1
1.10oz of Worsted Weight #3 Yarn in Color 2
4.50mm Crochet Hook

GAUGE – 5dc & 2 rows of dc measures approx 2” square

**************************************************

Round Table Mat – (Made in rounds with turning) With 4.50mm hook and color 1, ch4,
sl st to first ch to make a ring, ch3, (RS) work 12dc in ring, sl st to top of ch3. (12dc + ch3) 

Row 2 – Work ch3, 2dc in each dc to end, sl st to top of ch3. (24dc + ch3) 

Row 3 – Work ch3, 2dc in each dc to end, sl st to top of ch3. Fasten off. (48dc + ch3)

Row 4 – Join in color 2, ch3, 2dc in next dc, * skip 2dc, 3dc in next dc, * rpt from * to * to
last 2dc, skip last 2dc, sl st to top of ch3 on beginning of row. (16, 3dc groups)

Row 5 – sl st over first dc, ch3, 2dc in same space, * skip 1dc, 1sc in space between
next two 3dc groups, skip 1dc, 3dc in centre dc on next 3dc group, * rpt from * to * to
end, skip 1dc, 1sc in space between last two 3dc groups, sl st to top of ch3 on beginning
of row. (16, 3dc groups)

Row 6 – sl st over first dc, ch3, 4dc in base of ch3, * skip (1dc, 1sc, 1dc), work 5dc in
next dc, * rpt from * to * to end, sl st to top of ch3 on beginning of row. (16, 5dc groups)

Row 7 – sl st over next 2dc, ch3, 4dc in same space, * skip 2dc, 1sc in space between
next two 5dc groups, skip 2dc, 5dc in centre dc on next 5dc group, * rpt from * to * to end, skip 2dc, 1sc in space between last two 5dc groups, sl st to top of ch3 on beginning of
row. (16, 5dc groups)

Row 8 – sl st in next 2dc, ch3, (3dc, ch1, 4dc) in same dc, * skip (2dc, 1sc, 2dc), work
(4dc, ch1, 4dc) in next dc, * rpt from * to * to end, sl st to top of ch3 on beginning of row.
(16 shell groups)

Row 9 – sl st to next ch1 space, ch3, (3dc, ch1, 4dc) in same space, * skip 4dc, 1sc in
space between next two shell groups, skip 4dc, (4dc, ch1 4dc) in ch1 space on next Shell group, * rpt from * to * to end, skip 4dc, 1sc in space between last two shell groups, sl st
to top of ch3 on beginning of row. (16 shell groups) Fasten off.

Row 10 – Re-join color 1, ch1, 1sc in base of ch1, 1sc in each of next 3dc, * (1sc, ch2, 1sc) in next ch1 space, 1sc in each of next 4dc, sl st in sc, 1sc in each of next 4dc, * rpt from
* to * to last 4dc and sc, 1sc in each of last 4dc, sl st in sc, sl st to first sc on beginning of row. Fasten off.

Finishing – Sew in and tie off loose ends. 
http://www.patternsforcrochet.co.uk/round-table-mat-usa.html

——————♡♡♡♡♡♡♡♡——————-

This free crochet pattern in Norwegian
http://olavas.blogspot.pt/2009/08/oppskrift-pa-fargesterk-grytelapp.html?m=1

Stitch Chevron…. Crochet or haken Make me better

image

Here great site . This pattern is a little bit different than the second one
http://www.handcraftingwithlove.net/yarn/pat-ripple.html
————————————-
image

image

Sc2tog [Insert hook in next st, yo and draw up a lp] twice, yo and draw through all 3 lps on hook.
Dc2tog[Yo, insert hook in st, yo and draw up a lp, yo, draw through 2 lps on hook] twice, yo and draw through all 3 lps on hook.

(colors A, B, C, D, E, F, G)

Stripe sequences below are OPTIONAL; use one or combine all for a garment.

Sample is Stripe Sequence 1.

Stripe Sequence 1 Work 2 rows A, 1B, 2C, 3D, 1E, 2A, 3F, 1G 
Stripe Sequence 2 Work 1 row B, 1E, 2C, 2A, 3B, 1F, 2A, 2G, 1F, 3D 
Stripe Sequence 3 Work 3 rows C, 2B, 2A, 1E, 2G, 1B, 1F, 2D 
Stripe Sequence 4Work 2 rows A, 3B, 1E, 2A, 3C, 2D, 1F, 2A, 2G

(ch a multiple of 12 sts + 3)

Note: Work in back lps only throughout.

Row 1 Work 1 dc in 4th ch from hook, 1 dc in next 3 ch, [dc2tog over next 2 ch] twice, 1 dc in next 3 ch, 2 dc in next ch, *2 dc in next ch, 1 dc in next 3 ch, [dc2tog over next 2 ch] twice, 1 dc in next 3 ch, 2 dc in next ch; rep from * to end. Turn. 
Row 2 Ch 1, 2 sc in first dc, 1 sc in next 3 dc, [sc2tog] twice, 1 sc in next 3 dc, 2 sc in next dc, *2 sc in next dc, 1 sc in next 3 dc, [sc2tog] twice, 1 sc in next 3 dc, 2 sc in next dc; rep from *, end last rep with 2 sc in top of t-ch. Turn. 
Row 3Ch 3 (counts as 1 dc), 1 dc in first sc, 1 dc in next 3 sc, [dc2tog] twice, 1 dc in next 3 sc, 2 dc in next sc, *2 dc in next sc, 1 dc in next 3 sc, [dc2tog] twice, 1 dc in next 3 sc, 2 dc in next sc; rep from * to end. Turn.

Rep rows 2 and 3, continuing stripe .
🙂